
Crop Rotations
Creating a Wheat Lucerne Rotation
In this exercise you will create a wheat lucerne rotation where the forage phase lasts for several years.
This exercise has an accompanying powerpoint walkthrough that a) describes the rotation manager in general terms, and b) shows how extend this rotation with external manager logic.
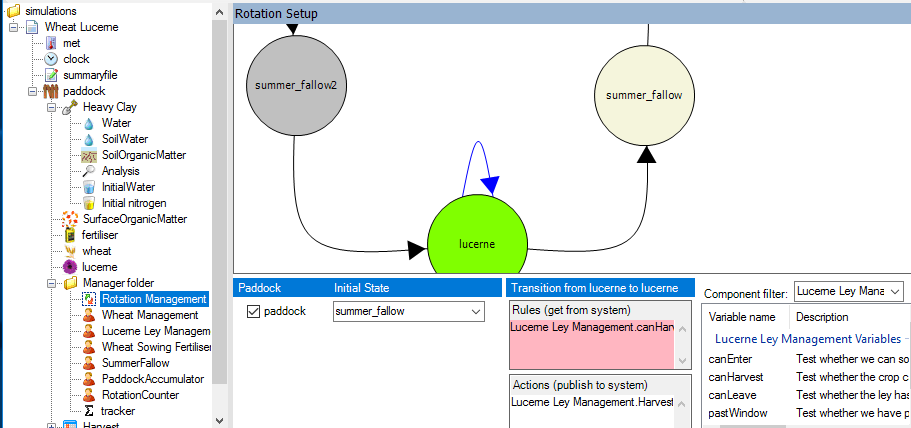
1. Create a new simulation based on the “Rotation Sample.apsim”. It’s a Wheat Chickpea rotation. In the Manager folder, the Rotation Management component is used to represent the rotations, using a Directed Graph with nodes (circles) for simulation states such as wheat or fallow, and arcs between states representing the ways that the manager component can move, or transition between these states. The Rotation Management component should be the first item in the Manager folder.
There are Rules and Actions associated with transitions: Rules that describe the feasibility of a transition, and Actions that describe events that occur in the system when the transition is made. Each day, the management component examines each transition out of the current state, and should the rules allow (they are usually integer values 0 or 1), it will undertake the actions associated with that transition.
2. Change the name of the simulation to “Wheat Lucerne” and save to the same filename.
3. Check met file is Goondiwindi 1940-1989 and make the simulation run for entire length of met file (1/01/1940 to 31/12/1989).
4. Change the soil to Heavy Clay from the Training Soils toolbox (see Module 1 if you don’t have it). Add lucerne to the Water node of the soil (See Module 5, step 11 if you haven’t done this before. Make sure you add lucerne to the list; instead of renaming an existing node. Copy the LL, PAWC, KL and XF data from the Sorghum node.
5. Set starting water to 100% filled from the top.
6. Set starting nitrogen to 0.1 ppm in every layer (copy the layer structure from the Water node) for both NO3 and NH4. These can be entered into each level, or the total can be entered by right clicking the heading and selecting Set Total.
7. Delete the chickpea crop from the simulation. Delete the management rule for chickpea as well.
8. Add a lucerne crop to the paddock (from the Standard toolbox, under “Crops”), and a Lucerne Ley Management component to the manager folder (Management toolbox, Manager.NET common tasks), and move it up to ensure that it is under Wheat Management. Make sure the the “must sow” parameter of the Lucerne Ley Management component to “yes”
9. Change Wheat Management module’s “must sow” parameter to “yes” so that the model plants in window.
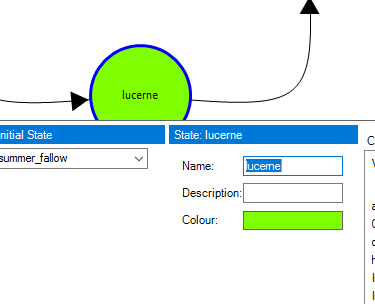
10. In the Rotation Management component, rename the chickpea node to lucerne: select it with the left button, then type into the “Name” entry box in the centre pane. You can optionally add a description, and also change colour.
11. Add an arc from the renamed node (again, select with left button, it turns blue) to itself (right click on node). Select this new arc (it turns blue when selected) and then click in the Rules box – it will turn pink. Find the “Lucerne Ley Management” entry in the component filter, and double click on the “canHarvest” variable from the list below. Click in the Actions box, and double click on the “Harvest” event. When you’re finished it should like the following:
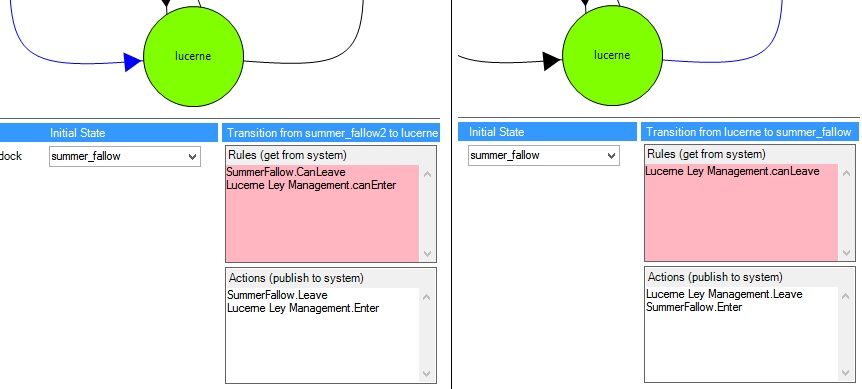
12. Select the arc leading into the lucerne state, and change the “Chickpea Management” rules and actions to “Lucerne Ley Management” rules. Do the same for the arc leading from the lucerne node. The order of these Rules and Actions are important. When you’re finished, the arc rules and actions should look like the following:
Some further background on crop rotations in Apsim can be read here
13. There are two output files: one of harvest data, and the other (Phases) with one line per state transition. The harvest output format is familiar and works seamlessly with the graphing component, the second is a condensed output that can be easily loaded into analysis programs such as R. The second relies on several helpers (the PaddockAccumulator and RotationCounter components) in the manager folder to provide water, N and organic carbon state variables for each phase in the rotation. Check that you understand the variables in each file – they have descriptions in the variable filter.
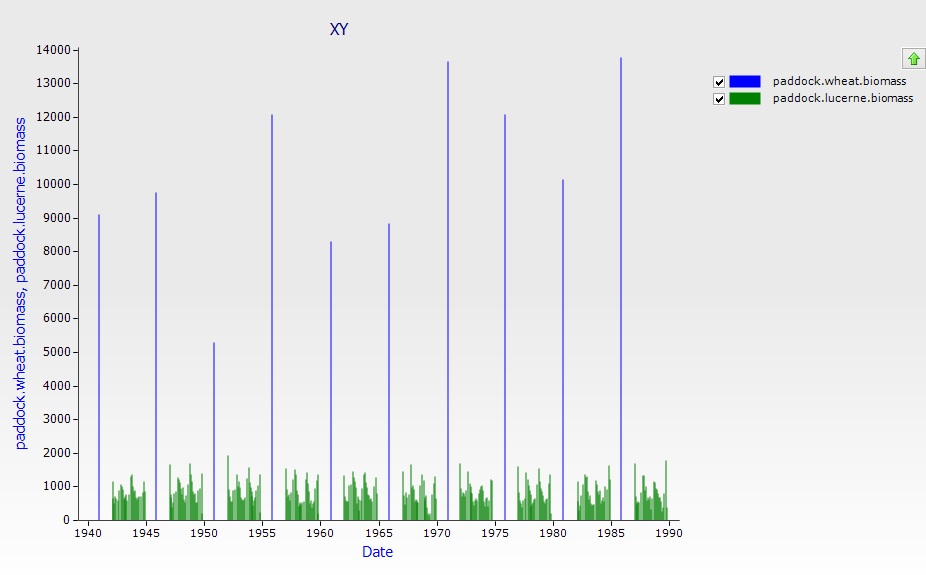
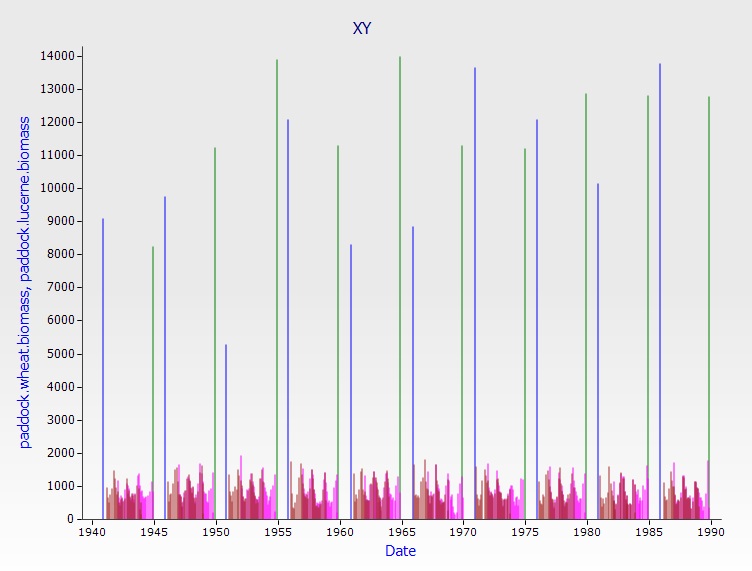
14. Run APSIM and plot year vs biomass as a bar chart using an XY graph component.
Offset Rotation
1. Duplicate the previous simulation and give it a new name.
2. Change the initial state of the rotation in the new simulation from “summer_fallow” to “summer_fallow2”.
3. Run this second simulation and plot year vs. biomass for both simulations on the same graph using an XY graph component.
Further information
Supplementary information on GUI manipulation and the underlying functions of the rotation manager is available in a Powerpoint Presentation and the following videos: Crop Rotations in Classic Part 1 and Crop Rotations in Classic Part 2.