The user interface
In this section we describe the basics of the APSIM Next generation user interface used by CLEM.
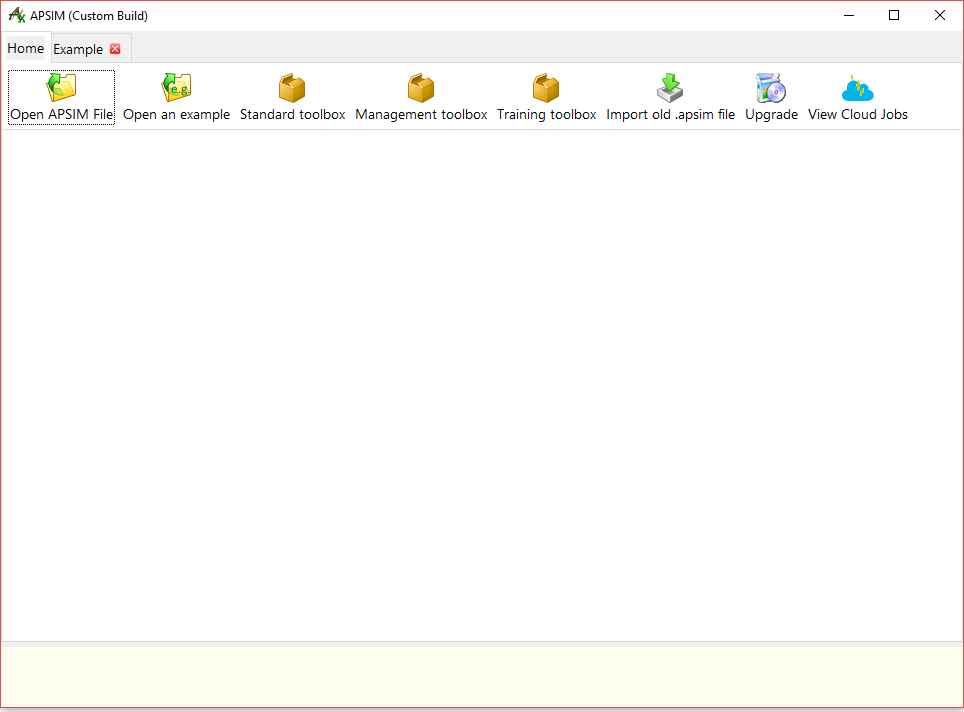
The first screen you are presented with when you start APSIM Next Generation (see below) provides a bar of icons to open APSIMx files or a range of toolboxes as well as importing files from previous versions of APSIM, upgrading and using cloud based simulations (for more details on these options we refer you to the APSIM Next Generation help). This screen can always be accessed by selecting the Home tab in the tab strip above the menu. A list of previously opened APSIMX files will appear in the main area for easy access.
After you have opened an APSIMX file it will appear with all other open files as a tab in the tab strip. The details of the selected APSIMx file are displayed in the main area with a simulations tree structure to the left and the general display area to the right (see below). The general display area will provide information about the selected part of the simulation tree structure such as tools for providing parameters, summary information, output tables and graphs.
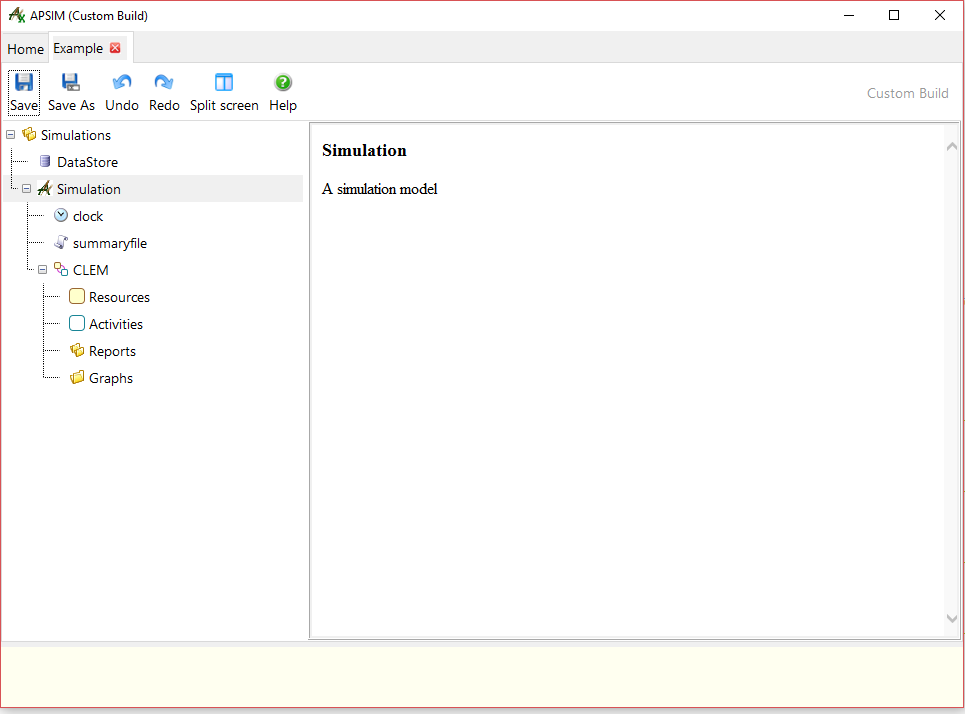
The menu options will change to those allowing you to save the current file and undo or redo previous changes.
The area at the bottom of the window will present details of any errors encountered while performing your simulation.
Split screen
The split screen option in the menu icons allows you to have two APSIMx files or Toolboxes open at the same time. This is useful for comparing simulations and accessing components in other files or toolboxes to add to your simulation (see Managing model components).
See Building your simulation for more details